|
Building an organ - the largest and most complex musical instrument of all - takes a huge amount of material, craftsmanship, time and money. Frequently it takes several years of planning and
construction until the pipe organ is finally completed, and there are many different crafts involved in the process. In this passage the process of building an organ will be explained in a somewhat simplified manner but with many pictures to help you understand it all (the high-resolution pictures are only available for subscribers with full access to the Organ Site. I would like to thank Karl Schuke Organbuilders (Berlin, Germany) who provided me with many of the pictures and helped immensely with setting up this section. |
| 1. Preliminary planning and construction |
|
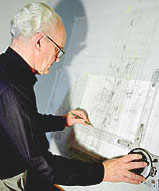
At an outset a group of people, including at least the organist, a representative of the church (or concert hall), an organ expert and the organbuilder, meet
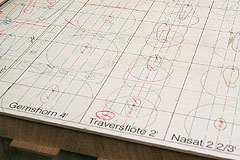
to put down the parameters for the new organ, which will be the basis for any further designs and bids. The meeting serves to establish the anticipated size, the appearance and the stoplist, i.e.
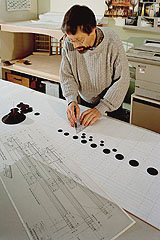
the pipe rows (sound colors) to be included. After that the designer and constructor draws up some blueprints. For this he employs a drafting board as well as some specialized software on his computer. Sometimes a scale model will be constructed or a computer graphics simulation will be used to get a better notion of what effect the organ will have on the place where it is going to be installed. |
 |
| 2. Material sourcing |
|
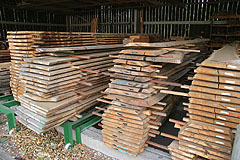
When the contract has been awarded and a certain model decided on, the materials have to be chosen and ordered. The most important raw material in a pipe organ is wood.
It is needed for almost all parts of it: the casing, pipes, windchest, bellows compartment, console, action etc. Having well-seasoned wood at hand is essential to building a good organ. This is the
reason why the bigger organbuilding companies have their own lumberyard from which they take the wood when they need it, and they see to it that the stocks are
continually replenished. While the wood is picked from the company's lumberyard, the other raw materials for the manufacturing of the pipes (tin, lead, copper, ...) have to be ordered and all the other constituents bought from outside, like leather for the bellows, felt, small pieces, plastic, the blower motor, electronics, cables, screws, etc. |
 |
| 3. Constructing the organ |
| When the materials have arrived the different "shops" in the manufacture start their work: they build the pipes, the chest, the bellows compartment, the wind channels, the action, the console and the casing; in larger organs a combination system has to be planned and programmed as well. |
| 3.1. Making the pipes |
 |
There are basically two families of organ pipes that are constructed entirely differently: flue pipes and reed pipes
(c.f. Varieties of pipes). Both metal and wood can be used in making pipes (in reed pipes, though, only the resonator may be made of wood, the boot is always made of metal). What the pipe is intended to sound like determines the material it is made of, its shape and its scaling (i.e. the pipe's width). Each rank (i.e. each sound color) has its special design. As building the pipes is very complex and expensive and calls for special craftsmanship, many organbuilding companies today no longer have their own pipe shop but buy ready-made pipes or pipes made to order by specialized companies. Opinions differ on the question if and how far individuality and quality suffer from this. At any rate, there is no harm having the construction of both the organ and its pipes all in one hand :-) |
3.1.1. Making metal flue pipes
|
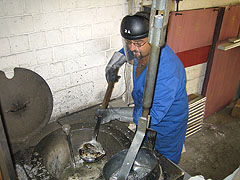
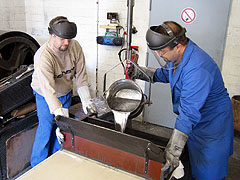
Making a flue pipe starts with choosing the right metal alloy. Most pipes are made from a tin-lead-alloy. The higher the percentage of tin the more durable
and shiny (and more expensive) the pipes will be. In general the mixing ratio is 75-80% tin for pipes standing visibly in the facade of the organ and 30-75% for pipes hidden in the back. The choice
of the alloy may also depend on the intended sound. Casting the metal pipe starts with melting the tin and lead ingots for the respective alloy at a temperature of up to 350°C (660°F) in a large melting pot. Then the molten metal is poured into the casting box and pushed along the casting bench. The liquid alloy is discharged from a slot in the back of the casting box and spreads evenly over the casting bench. |
 |
 |
 |
 |
|||
| The metal alloy is melted | The casting box is filled ... | ... and pushed along the casting bench | The tin sheet after it has cooled down |
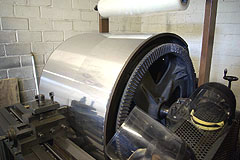
|
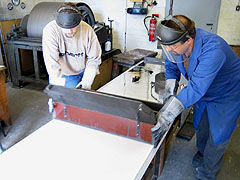
When the metal sheet has cooled down it is attached to a large rotating drum and dressed to the desired thickness or planed
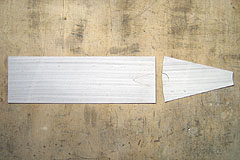
on a horizontal planing bench. After planing the metal sheets have to rest for some time to reduce tension. Then they can be cut to the shape of the desired pipes. On the cutting table both the cylindrical pipe body as well as the conical pipe foot are cut from the metal sheet. |
 |
 |
 |
 |
|||
| A tin sheet is turned on a drum | The tin sheet is unreeled on the cutting table | The parts of the pipe are cut | Cutting with a cutting machine |
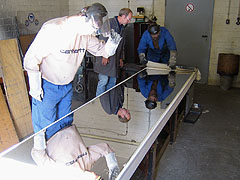
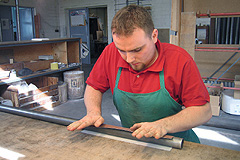
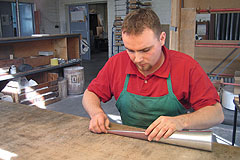
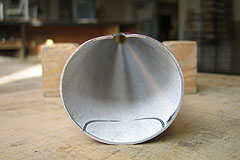
| Then work advances to the next level: The parts are rounded. First the metal sheets are rolled up around cylindrical or tapered mandrels of different diameters so that you have cylinders that are open to the small sides, curved to different degrees to form the different pipe bodies and feet (after all, there are to be pipes of different diameters or "scales"). Then the pipe is painted with a protective color, beveled on the open longitudinal edge and soldered. After that the pipes and feet are put back on the metal cylinders and cones and rounded with a mallet. |
 |
 |
 |
 |
|||
| The pieces for the pipe body and foot | Forming the pipe body around a cylindr. mandrel | Forming the pipe foot around a tapered mandrel | Pipe foot with marked out lip | |||
 |
 |
 |
 |
|||
| Beveling the longitudinal edges | Soldering the pipe body | Rounding with a mallet | Rounding with a mallet | |||
| The following step is the forming of the labia. The labium is a "dent" above and below the mouth, and behind this mouth you have the languid (c.f. Varieties of pipes for a diagram). When the pipe is blown the wind issues from the slit-like flue at the base of the mouth of the pipe and hits the labium. There it generates a vibration of the air column in the pipe body. The dimensions of the labia, the languid, the flue and the cut-up are the main determinants of the sound the pipe is going to produce. |
 |
 |
 |
 |
|||
| Shaping the lower lip | Shaping the upper lip | Shaping the upper lip | Coating the pipe with a protective color |
| Then the unfinished pipes are painted with a protective color. For the languids metal plates are first fined down, then the languids are cut from them. When they are cut they are soldered on to the pipe foot, planed and soldered to the pipe body. The next to last step is the cutting of the upper slit (the slit above the languid. Finally the pipes are cleaned and, if need be, polished. |
 |
 |
 |
 |
|||
| Fining down the plates for the languids | Laying out the measurements of the languid | Soldering the languids on to the pipe foot | Flattening the soldering edges | |||
 |
 |
 |
 |
|||
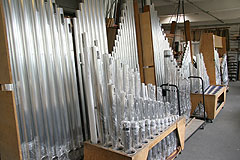
| Cutting the mouth | Cleaning the pipes | From the cutting to the finished pipe | Stocking the finished metal pipes | |||
|
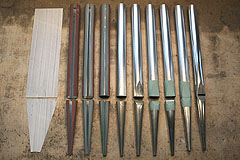
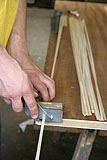
3.1.2. Building wooden flue pipes Flue pipe made of wood are constructed according to the same pattern as metal flue pipes, except that all parts are made from wood and the pipe body is usually rectangular. There are several kinds of wood that can be used to make pipes. The ones mainly used are spruce, pine, maple and oak. The picture to the far right shows the finished pipes of a complete organ stop. It is also called a rank of pipes, in this case it is a Subbass 16' one pipe for each tone / key. |
 |
 |
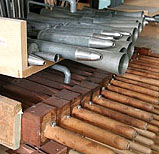
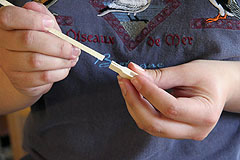
3.1.3. Building reed pipes
 |
Reed pipes work entirely differently from flue pipes. The central parts are the tongue and the shallot.
When the air is blown into the pipe it first hits a metal tongue resting against the opening in the side of the shallot, keeping a little distance from it and fixed to it at its upper
ending. The picture on the left shows the work on such a tongue. The resonator may be made of metal or wood, and it can have all kinds of shapes. The tone color and intensity will vary accordingly (c.f. Varieties of pipes). |
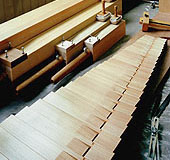
| 3.2. Building the windchest |
|
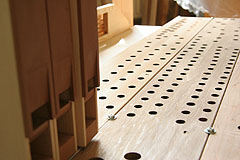
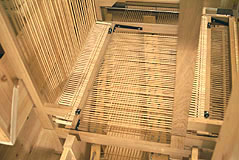
Basically, a windchest is a wooden box divided into single channels, on which the pipes are to stand. It serves to direct the wind to exactly
the pipe that generates the pitch corresponding to the key pressed on the console (cf. How organs work). In a first step the windchests are constructed according to the construction plans and to the position of the pipe ranks. There results a frame, subdivided by several soundboards and bonded with a pallet board on the bottom and the so-called table on the top. Then the slits for the pallets are cut. When the chest is turned around the sliders and the guides are screwed onto the table. Then the toeboard, the sliders and the table are drilled all in one, so that later on, when the sliders are moved the holes will align. Later on, the sliders will be guided by the slider guides (cf. Cross section of a slider chest). When the pipes are sketched the toeboards are drilled. After drilling the boards are bonded and the drill holes are given a countersink and burnt, so that certain substances contained in the wood will not damage the pipe feet resting on them. Once the windchest is completed with all pallets, sliders, slider guides and the bellows control, a rackboard with rack pins is added to the top of the chest that will keep the pipes from falling down. The picture to the right shows the first step: Planning the position of the pipes on the windchest and marking the drillings and reamings. |
 |
 |
 |
 |
 |
 |
|
| Reaming plan attached to the unfinished w.chest | Reaming the pallet holes | Top view of the completed windchest | Bottom view with the pallets and the tone valves | Testing the windchest |
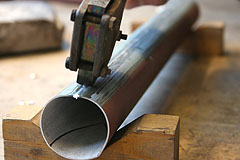
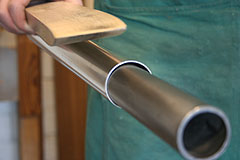
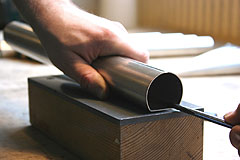
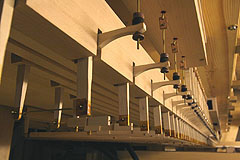
| 3.3. Building the bellows and wind conductor |
| The wind supply for the organ is generated by an electric blower that sucks in air and drives it into the bellows and from there through the wind conductors to the wind chestson which the pipes are sitting. The bellows serve to generate a continuous wind pressure, independent of how many stops have been pulled or how many keys have been pressed, that is, the wind pressure remains constant, no matter how many pipes are blown. For this the bellows have to be able to "breathe" and store air. There are different types of bellows: There are Schwimmer bellows, parallel-rise, single-wedge and double-wedge bellows. |
|
The wind pressure is established by the weights or springs attached to the bellows. Usually each division (manuals/pedal) of an organ has its own wind pressure so that a bellows
system has to be built separately for each division. The wind is directed from the bellows through the wind conductor zto the windchests and ultimately to the pipes. The wind conductors have to be arranged within the organ in a way that they reach all windchests but do not collide with the action or the mechanics inside the instrument. For that reason they tend to have several joints. All wind conductors have to be tightly sealed against wind leakage. |
 Mounted bellows system with weights for wind pressure control and connection with the wind conductors. |
||||||
 |
 |
 |
 |
||||
| Building a bellow | Structurally complete bellow | Building the wind conductor | Mounted blower with bellows | ||||
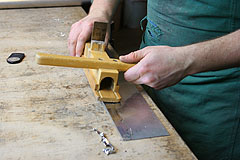
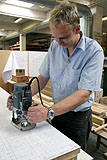
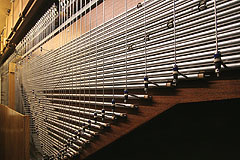
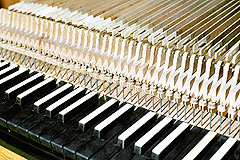
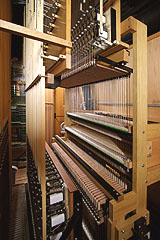
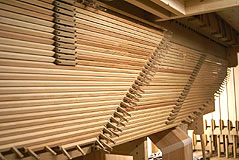
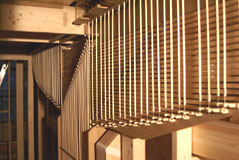
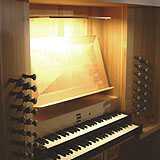
| 3.4. Building the key action and the console |
|
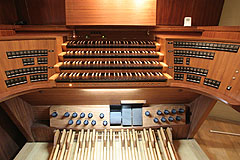
The concole is the command center of the organ. It needs to combine ergonomics, esthetics and precision in its mechanics as well as its visual
appearance. In a console, which may include up to six manuals and more than 100 stops, you have all the connections to the windchests and their stops and pallets coming together. There
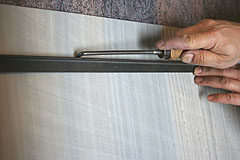
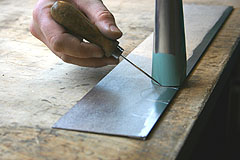
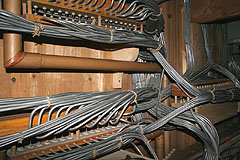
are two basic types of consoles, mechanical and electric consoles, and then there are combinations of the two. The action of an organ, i.e. the connection between the key and the pallet is either mechanic or electric (in the early 20th century many organs also had a pneumatic action). In an electric action the pallet is opened by an electromagnet. With this system it is possible to cover long distances that could not be covered by a mechanic action. In an electric action even wireless connections or fiber optic links can be employed. The "classic" mechanic action, on the other hand, fascinates by its extreme sensitivity and a feedback to the player. You can actually sense the opening of the pallets, provided the action has been constructed with utmost precision and runs smoothly. In a mechanic action the connection between the key and the pallet consists of very thin fir rods (the trackers), that have to be arranged at regular intervals. Aluminum rods have been used for the purpose, too. As the pipes can't all be aligned directly above the respective keys the motion of the keys has to be transferred laterally by a roller. The rollers are mounted on a roller board. There the movements are redirected to the respective pallets of the associated pipes. The above right picture shows the console of the organ of the Berlin Philharmonie with a mechanical key action and an electric stop action, the picture below it, taken from the same instrument, shows an aluminum roller board. |
  |
 |
 |
 |
 |
 |
||||
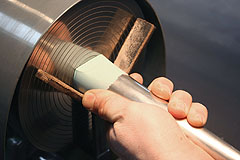
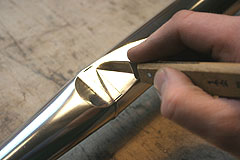
| Making the tracker rods | Cutting the rods | Gluing the rods to fasteners | Bonding | Keys and their connections to the trackers |
 |
 |
 |
 |
 Pneumatic action (generally in use around the turn of the 20th century) |
||
| Tracker action behind console | Tracker action in a large organ | Combination electronics | Memory for adj. combinations |
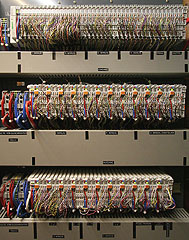
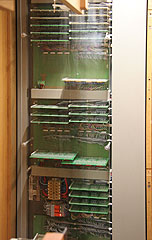
| Today most organs are constructed with a mechanical key action (= connection between the keys and the pipe pallets) and an electric stop action (connection between the drawknobs / stop tabs and the stops. This combines the advantages of a sensitive play (mechanics) with the opportunity to save thousands of combinations of stops (mixtures of sound) and completely change the registration by just pushing a button. The "pulling" of the stops is then accomplished via an electromagnet. The memories for combinations have to be programmed beforehand, i.e. adapted to the specific organ and its stoplist (= the list of all stops / rows of pipes included in the organ). |
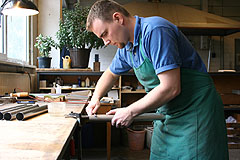
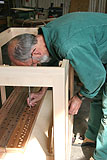
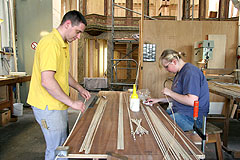
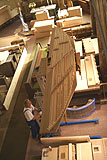
| 3.5. Building the case |
|
The organ case is constructed according to a constructional drawing. Here the most important factors are durability and resilience. An organ case with the posts inside it often
has to bear a weight of up to 50 tons. Special care has to be taken of the swell case: by stepping on the swell shoe the organist can open or close the slats of the swell and cause the sound to grow louder or less loud. The swell case consists of layers of adhesive-bonded layers with different material properties that permit a high sound attenuation. |
 |
 |
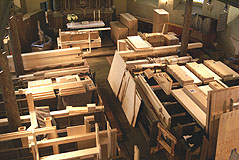
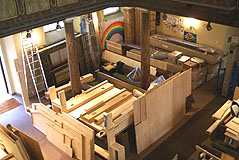
| 4. Assembly at the workshop |
 |
 |
 |
 |
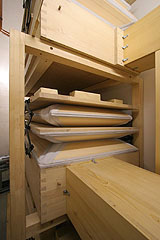
In most cases a new organ will be test assembled at the workshop before it is delivered in order to check if everything fits and works. Then it is disassembled again and packed for delivery. |
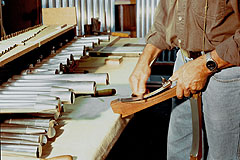
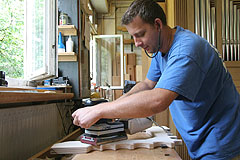
| 5. Preliminary voicing |
|
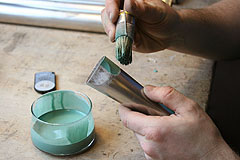
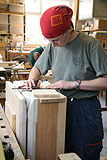
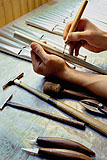
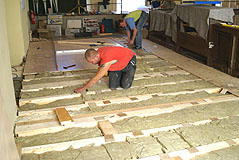
The pipes just produced do speak, but their voice has to be "enhanced" and tuned with the other pipes of the same rank (set of pipes) in order to achieve a harmonious overall sound.
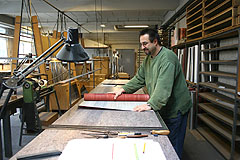
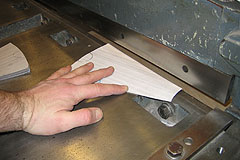
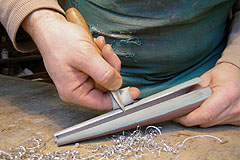
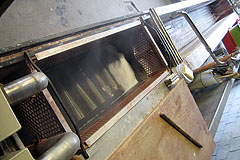
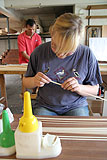
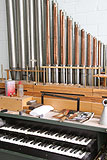
This procedure is called voicing. The final voicing is done when the organ is assembled in the place it was actually designed for, as the acoustics there obviously differ from the assembly shop's acoustics. So at the workshop only some preliminary voicing is carried out to balance major differences within a rank and attain a basic adjustment of the volume and responsiveness of each pipe. For this a voicing chestis used, a small open windchest with mechanics leading to a keyboard on which you can put and play several ranks at a time (picture at the top right). The wind pressure in the chest is adjustable as it has considerable influence on the sound. Voicing is an art that takes a lot of technical skills, intuition and a very fine ear. It would be too much for this website to elaborate on the process of voicing - suffice it to mention a few basic "tricks" voicers employ: Change the diameter of the pipe's foothole Change the windway (measurements, geometry, etc.) Change the height of the cut-up Change the position of the languid Nick the languid etc.. Preliminary voicing includes preliminary tuning. This helps save time when the organ is assembled at its final destination. The lower picture on the right shows the voicing specialist at work. |
  |
| 6. Loading and transport |
|
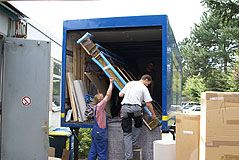
Once the assembly at the assembly shop has been satisfactory and the preliminary voicing completed the organ is disassembled and packed. Then all parts are loaded and transported
to their ultimate destination. The larger organs, weighing up to 50 tons, have to be transported by a semi-trailer, smaller organs will fit into a 7.5 ton truck. |

| 
|
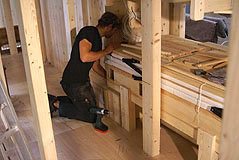
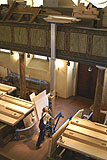
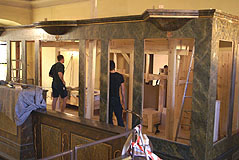
| 7. Assembly at the place of destination |
|
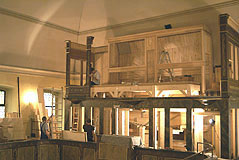
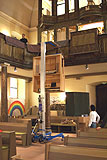
Now the organ has to be reassembled at its final destination just like it was at the workshop. Often the entire sanctuary has to serve as a storage place for days or even
weeks on end as thousands of parts first have to be unloaded and stored until, bit by bit, they are put together again. The following series of pictures shows the assembly of the new Schuke organ in the restored casing at the Johanniskirche (John's Church) at Frankfurt-Bornheim: |

| 
| 
| 
| |||
| Unloading the organ parts | Storing the organ parts in the sanctuary | |||||
| 
| 
| 
| 
| ||||
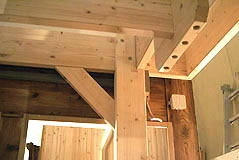
| Preparing the floor | Hoisting the parts to the gallery | Case sub-frame | Installed roller board | |||||
| 
| 
| 
| |||
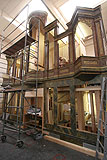
| Roller board with rods (tracker action) | Stabilizing the case with bracings | If the organ needs more space, stucco has to go | Assembling the case |
| 
| 
| 
| 
| 
| |||||
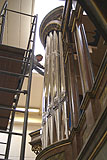
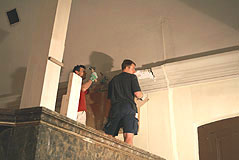
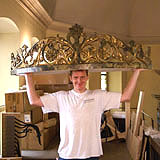
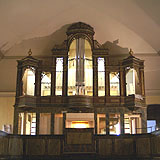
| Putting up the upper floor of the case | Carved pipe shade | Hoisting the console to the gallery | The mounted console | Installing the facade pipes | ||||||
| 8. Voicing and final tuning |
 |
When the technical assembly is completed and everything is working properly the voicer comes in once again to adjust the sound of each pipe to the rest of the pipes and ranks and to the
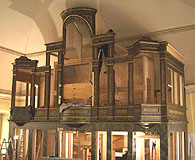
acoustics of the place of destination. The voicer's work is crucial to the sound quality of the new organ. After or together with the voicing the final tuning is done. Depending on the size of the instrument (a few hundred to many thousand pipes!) these works may take something between a few weeks and several months. The picture on the left shows the completed organ of the Johannis Church at Frankfurt-Bornheim. All in all this relatively small organ contains more than 30,000 individual parts, including some 2,000 pipes. |
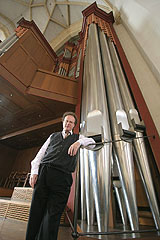
| 9. Final appraisal by organ experts |
|
At the end of the process the organ has to undergo its "final". This is considered to be passed if the organist, the buyer and the experts have approved the organ. There used to be a tradition - up to the 19th century - that when the organ was approved the organbuilder would receive as much wine as the largest pipe in the organ would hold. In the case of a large organ with a Principal 32' rank in the pedal (in the picture to the right: cathedral organist Hans Leitner in front of the 32' (10 m) high pedal pipes of the Munich Cathedral organ) this would amount to some 330 gallons (1,250 liters). (Too bad that this tradition has been discontinued ;-) Some figures on the Munich Cathedral organ: The construction of the main organ alone took 38,000 working hours. Out of these 38,000 hours the planning and construction took some 2,300 hours and the construction of the casing 6,500 hours. It took 3,500 cu ft (100 m³) of fir wood to build just the casing (some 16 m / 53 ft high and 10 m / 33 ft wide, enclosing a total volume of 10,600 cu ft or 300 m³!). The total length of the wind conductors is 440 ft / 135 m; the rods for the tracker action have a total length of 5,000 ft / 1.5 km. The main organ has 7,165 pipes, their sizes vary from 0.2 in / 4 mm to 33 ft / 10.20 m. |
 |
| I hope that this has given you a notion of how much time and effort, hard work, craftsmanship and individuality are involved in building a pipe organ. It might also explain why pipe organs are so incredibly expensive... |
|
You'll find an also very interesting documentation how the organ at St Mary's Church at Gelnhausen was built on the website of Jörg Schellschmidt. |